Tuesday

Butterfly Know How

I love to see butterflies soaring through the yard stopping from plant to plant to rest, lay eggs and get some nectar. I always go to the National Wildlife Federation  for any information. I do this because they are there to help me and not sell me stuff or having blinking pop up's when I least expect it. Like when I am reading about a topic I need to know more about. This site is reliable and non-profit!


Here is NWF  link for their Gardening to attract butterflies  .

Now back to the butterfly not only are they beautiful they have so many benefits for the yard. They help to pollinate the flowers in your yard. You need to plant more than just the kind of flowers they need to eat. 

You would be wise to help them out by planting\things where they can find shelter, lay there eggs, nectar as food, plants for the larvae (caterpillar's) places to form chrysalises.You want the butterflies to find a home with all the things they need to stay in your yard to enjoy. 
Here are some tips:

Plant native flower - there are different flowers for different areas. You want to provide shelter, nectars 

I have a few butterfly bushes in my yard, some Yarrow plants and some Milkweed . 


Also a
ll of these tools and plants are great for my area I am in Zone 18 in Southern California you can find your zone by going here.

They love the variety of colors butterflies are attracted to red, yellow ,purple, orange and pink. They prefer flat and clustered flowers.


They love love love the sunshine. If you notice while you start to build your butterfly garden that most plant that thrive in the sun are native to your area and drought tolerant. Plant so that when one plant dies off another will be blooming through the butterfly season
NO INSECTICIDES OR BUG KILLERS. 

This MUST be  a natural garden. Cater to your caterpillars


I hope this helps a little. I have a hill that I am planting just for butterflies and I will post as I create it. It should be fun and take a least one year but remember Rome was not built in a day!

Life Cycle of a Monarch Butterfly


How long long do they live ?

This is a complicated question because it has two seasons of life below find a month to month view. is a calendar view. 


February to March : Monarchs hibernate here in Southern California and Mexico and February and March is when they wake up, and start the search for their new mate. Once they mate then they take flight north to lay their eggs. Then their life cycle is complete. They have lasted through the Winter just to do this for us.


March and April : The first Monarch's are born and start the life cycle through the rest of the
months. It repeats the same cycle from May/June to July/August then in


September and October : The last (4th) generation is born from egg to caterpillar to chrysalis then butterfly.  The difference with the 4th generation is these have a longer life cycle. It Migrates south and lives 6 to 8 months in Mexico or here in Southern California. Then the whole cycle begins again in February and March of the following Spring when they lay their eggs.


Tomatomania


Well the tomatoes seem to be doing better than last year. Last year I planted great and expensive heirloom's and the next day the gofers ate them pulled them right down the shoot! It may even have been rabbits (love them) who knows there are so many critters here.


Noting that  a pellet gun and road flares did not take care of this problem.


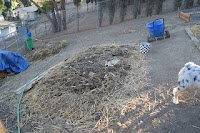
I filled the gopher holes with horse poop. It sure did help. Now I am showing you the first pictures prior to putting anything into the raised bed. It is up behind the barn.Where I had the pine tree removed. Oh tree huggers do not fret I used the wood for several projects and we still have so much left.


Now the tomato plants I put in my friend Julie got me at Tomatomania. This is a great once a year festival that goes across the country telling tales and selling all the tomatoes you little heart desires.


The tomatoes are doing well one of the two things the rabbits and ground squirrel have not eaten. The three types I have are

Heirloom Pineapple - Heirloom pineapple  tomato plants (Lycopersicon esculentum "Pineapple") produce fruits that have yellow and red striped skin and flesh. The tomatoes are exceptionally large, weighing as much as 2 pounds when fully ripe. Heirloom pineapple tomatoes are indeterminate, meaning the vine continues to grow and produce fruit until frost arrives. The plants thrive in full sun and rich soil with excellent drainage. They are usually started indoors from seed, as heirloom varieties can be difficult to find in nurseries and gardening centers.

Beefmaster - A beefsteak tomato  is any of the largest varieties of cultivated tomatoes some weighing 1 pound (450 g) or more. Most are pink or red even purplish black with numerous small seed compartments distributed throughout the fruit. While popular among home growers for sandwich making and other applications requiring a large tomato to be eaten raw, beefsteaks are not grown commercially as often as other types, since they are not considered as suitable for mechanization as smaller slicing tomatoes.


Green Zebra- is a tomato cultivar with characteristic dark green and yellow stripes. Newer variations blush reddish instead of yellow when ripe. It is more tart  than regular tomatoes, and it is an early breed.


San Marzano - a variety of plum tomato are considered by many chefs to be the best sauce
tomato  in the world. Marzano tomatoes are thinner and pointier in shape. The flesh is much thicker with fewer seeds, and the taste is much stronger, more sweet and less acidic. Many people who describe the taste as bittersweet, like high-quality chocolate. Because of their high quality and origins near Naples, San Marzano tomatoes have been designated as the only tomatoes that can be used for Vera 

Well there you have it my tomato adventure maybe this year I will be able to eat one. Actually I ate one not ripe just to do it!

Saturday

Daffodils


Oh my they say just after it rains is the best time to take pictures. I was so excited about the rain stopping I forgot to put my muck boots on so my jammies and shoes got so muddy. Yes I said Jammies. 


When it rains we think that there is no reason to get dressed or put on makeup. Mama and I decided this ! And Mama is always right!


On my way up the hill to the barn I started to notice all the bulbs that are coming up they are everywhere. I will give you a bit of bulb History . I bought a large 40 bulb bag thinking that why not just buy a bag rather than a little bag with only a few. Go Big or Go Home!

Well they sat for quite a while first off the fricken bag was heavier than ever! I bought a big bag of bulbs. Finally, I decided to put my bulbs in. Another great thing is they deter gophers.


My main thought through this whole process was get rid of the gophers and research told me they do not like daffodils bulbs. 


The idea was all on the hill just below the barn so Mama can gaze up when she is relaxing on the lower patio and see the lovely bulbs that her darling little girl planted just for her. Well the Goddamn ground was hard as a rock. So I tilled and covered it with compost from my Horse poop compost pile. Moving on -  after I got done with the hill right there to your right. I still had a crap load of bulbs. Now what!? Plant, plant and more planting.

They are coming up great. Ok now the rest of the bulb story!


So I decided to plant some in the Wine Bottle raised garden. Behind the barn! How pretty will that be for the rider's going by on their horses. I took all my Mommy's empty wine bottles and made a cute border by turning them upside down and burying them. The sun hit them and they look really pretty.


I planted those bulbs and got a couple of years of good growth and therein lies the problem. All of a sudden they stopped sprouting in different areas. My first thought is not enough moisture so water more but nothing. Also it did deter the gophers where ever they were planted but having an acre is tough to cover with daffodils. So traps and peppermint balls helped. All in all it was my first time planting daffodils and it really is fun working with bulbs and they are much easier than expected to plant. Plus you plant them once, they die back and pop up the following year. Not much work but fertilizer. 


Friday

Egg Shells for the Garden


People come into my kitchen and always say "What's with the shells?"

I have to stop thinking "Duh Garden!"

Ah Yes, I remember back in the day when I was just a wee gardener and did not know the egg shell trick. You save your egg shells and crunch them up and scatter them where ever there are snails. I am sorry to say but it slits there little necks!
Look when it comes to my garden snails are not allowed. And snails we avoid stepping on them because of the slime. 

They leave a wet trail on the cement. The worse is I can not step on them because of the awful crunch. And really who picks them up and throws them out in the street besides my father?

We do not eat them well I do not. I will let the French keep that habit.


Look this works and please do not tell me I should not eat so many eggs. Blame the chickens. Also, egg shells are great for compost piles. 

Happy Gardening


Thursday

Zinnia Seeds


Zinnia flowers are the easiest flowers to grow from seed. Collecting the seeds is just as easy. This is not going to take to much time to explain. And on top of it I planted some seeds to make sure they are really seeds. It blows me away when I see some types of seeds and say Nahh this can not be a seed. This flower seed is one of them. 

This process is going to be so simple let's get started. Let your Flowers grow. Zinna's are very hardy and strong. 


When the Zinnia has started to brown and dry up leave it on the stem. I have found the longer you leave anything you expect seeds from the better. It makes the seeds more potent and strong. The seeds of this flower are on the end of each petal. I first cut the dry flower off the stem. The petals of the Zinnia stay in place until you remove them. Cut the Zinnia flowers off and collect them in a vessel of your choice. I use old pie tins for so much of my Seed Saving.


Now that you have the dried Zinnias gently pull the petals off the flower. I keep the colors separate. They still have color left on them even dried up. 

Store the seeds in any container that will keep them dry. I put them in a plain envelope for a few months until I packaged them. Look at the picture of the petals in my hand the seeds are attached to the end. It looks like the seeds are nothing flat and boring But they are good I planted some a few weeks ago and they popped right up.


Separate the leaf from the seed. I have given you pictures to show you what they will look like. 

So there you have it easy peezy good luck and leave any
questions or comments below!

Wednesday

Covered Wagons


Alrighty I had to cover the new half ass raised sort of gardens. Look this is the year of use what you have. So the raised gardens are only raised with the amount of wood I found behind the barn. Ok off topic the reason for this post is the Covered Wagon which are the netting and how I did it. There is no netting on these ones yet still had plants to plant.


What you need:

Flexible PVC pipe
Dowels
Garden netting
Bottle of water


I took pictures around the neighborhood of all sort of ways to attach pvc etc this is what I came up with but I'm sure someone else discovered it. Of course.....

So I bought a roll of flexible PVC, dowels and the netting. Dowels are long wooden poles they come in lots of sizes. I had the guy at the Lowegies cut the dowels into three so for each dowel I got three poles. Two dowels for each pvc pipe. The dowels ended up being about 12" each.


Ok so you pound the dowel into the ground . The PVC  please measure it first and cut it a bit longer because if you want it to go down to the ground you must at least 3 to 4 inches. Trust me...

.
 I did not and I now have very large straws for the giant that should be coming down my bean stock any day now. 


Once you have put the dowels where you want and the PVC on each end attach the other end to the opposite side. 


I kept about 3 feet between each tunnel. And from dowel to dowel about the same.
 
The measurements are give or take. Notice on the picture here 
to your right I made small ones and larger. One planted you can cover the hoops with netting. 


This project is rather simple my directions may seem a little unprofessional but we do the bet we can. This project is great for rabbit season and for vegetables that do not need consistent attention. Like lettuce, root vegetables. You would have issues doing this for tomatoes seeing as you have to pick them daily. With the light netting tents you can spray, water and keep an eye one all things under it. 


I planted these roses last year for when people ride by on their horses.

My back area backs up to a bridle path. Then below you have my covered wagons.  Also we have a variety of fruit trees and plenty of nectar for bees and butterflies.  Alrighty have a good gardening day.

Saturday

Roses

Each year on Mother's day my son "Apron Strings" gets me a rose bush. I never had any interest in them. In my mind they were boring and stupid.

Now as the years have gone one into another I adore my rose bushes. I love to cut them and bring them in the house. There are so many ! I prune in January or February and use Epsom Salts also. I have never bought a rose fertilizer but it may help you with your roses. 


This little orange one has been transplanted twice and survived and the color is such a bright and mellow orange. I wish I knew the names of the roses. 


This yellow bush is right next to my fountain and the birds use it all the time to perch either prior to their bath or after to shake the water off.


This red one is under a tree we never even knew we had it. One day I was a beautiful red something behind the tee. It was so red and so beautiful it reminds me of the rose in Beauty and the Beast


These nice candy cane ones are up on the gate behind the barn. When people walk or ride their horses by I thought it was a nice thing to look at. Candy Cane who would have thought that a rose could do the strip thing! Over the years it has just gotten more beautiful.


And the last vine-ing was from my sister Casey in Hemet she has since passed so having it up on the gate is really a great memory. This ne has gone crazy big and turned out to be a great vining plant. Ever time I see it it reminds me of her. It would not last in the weather out in the desert so she dug it up and brought it to us. LUCKY.


The great thing about roses I have found is they are so forgiving. This is only a few of mine. Year after year they come back some years more blooms than others.
 Thanks for taking the Rose tour!

Vinegar VS Roundup


Everyone has to admit with all the hub-bub about Monsanto and Roundup we need to get back to basics. I love to make my own vinegar but that is another subject. In the garden the stuff I can reuse is endless. I re-use any wood , concrete and odds and ends from all over our neighborhood. Yes, people do look at me strange but when they see how I have used thing's in the yard they are impressed.

But let us stay focused on the use of vinegar in the garden.


Well the information read's kind of like this :

Vinegar is a natural product, usually derived from grain, apples or grapes.
It is distilled through a fermentation process.
The vinegar you buy is typically labeled at 5% acidity. This means it contains 5% acetic acid, the active ingredient.

Acetic acid is what makes vinegar a weed killer. Actually, it makes vinegar a plant killer. Grrrr  because it draws all the moisture out of the leaf.

Spraying full strength vinegar on a plant in full sun will often result in a withered, brown plant in only a few hours, for sensitive weeds, or by the next day in tougher plants.
It is non-selective, meaning it might kill everything it touches. This limits the usefulness of a vinegar weed killer, to the extent that you are able to control over spray that would get on desirable plants.

The Recipe changes from site to site but this is the one I got from a class I took on Natural Alternatives for the Yard

Ingredients

1 Gallon Distilled Vinegar
1 cup salt
1 tablespoon of soap (any liquid soap)
1 cup warm water ( Warm just sounds so soothing for the
poor weeds)


A Great site for information on Vinegar and the Do's and Don't and great information

Friday

Saving your Tomato Seeds

Saving seeds is a hobby I just love. There are some rules to this hobby. The main thing is you do not want to save seeds from any store bought fruit or vegetables. Those could have been sprayed with pesticides and also almost 99% of store bought fruit and vegetables are hybrid which means they will only produce one generation.


You can save them if you want to try. 

Get seeds that come from a reliable source:

  • Your Garden
  • Farmers Market
  • Neighbors Garden
Tools you will need:

  • Bowls for each type of seed (Like Beef Steak, Roma etc)
  • Small jars for each variety
  • Strainer
  • Cheesecloth
  • Rubber Bands
  • Small spoon
  • Labels/Small Post its or piece of paper


Back to business take the tomato you want to save the seeds for and cut it in half. You will see the seed and take your spoon and scoop the seeds out into the bowl. Do not worry about the gunk sticking to your seeds we will clean that off later. Once you have gotten the seeds out for both sides of your tomato you can still use that tomato for a meal or snack. 


Do the rest of the tomatoes at the same time keeping them separate and having labels. 
There have been times when I did not label and it was a guessing game the following Spring. 

Now you should have all you seeds out and ready to be cleaned. 


Take each bowl and pour your gunky seeds into the strainer run cold water over them while lightly rubbing the gunk off as much as you can. This is only the first cleaning it just get the large stuff off. 


Each different type of tomato seed will have its own container take the seeds and put them in a jar and fill that jar half way up with cold water. Some seeds (the bad ones) will float and then others (the good ones) will sink.  Once they are all cleaned and in their jars cover the jars with cheesecloth and secure with a rubber band. Let them sit for at least one week. This is when they are germinating. 


Now after the one week take each jar and get rid of anything that is floating. If you pour the liquid out gently the top stuff drains out. There may be some extra but that just use a spoon to grab them our. Get your strainer back out and clean the seeds that have sunk to the bottom
 those are the good seeds. 


You will need some paper towels to dry them. Just lay them out on the wax paper or clean plate label it. I don't use the paper towels to dry them they end up sticking and it is a pain in the butt to seperate. Once the seeds have dried which takes about 3 weeks they are ready to get bagged. 


I save all containers. The small seeds in this post were saved in an old makeup container and the large batch in an old cassette tape box. Boom

Done! I use bags when I am trading seeds Make them cute they make a great gift with a little garden pot of soil. 


Nasturtiums grow and seed saving

  Nasturtium flower what a delight and easy flower to grow. The bonus is is comes back every year and self seeds your garden on it's own...